Learning to sharpen your dull kitchen knives is a skill you’ll value forever, whether you use a handheld sharpener or a sharpening stone. So, How to Sharpen a Kitchen Knife?
You need to hold your knife stable, soaking, choose the grit, use a stone fixer to level the sharpening surface, hold three points on your knife, and you should not be able to feel a burr…
Keep reading.
How to Sharpen a Kitchen Knife?
Below is the step-by-step guide:
Hold Your Knife Stable
Prepare your stone (you can check out our best whetstones available for sharpening tools). To maintain the knife’s stability at the same angle, hold it at all times at four points. The knife should be held steadily by your dominant hand while being lightly guided by the other hand.
Remember, There is No One Right Way
Keep in mind that there are various methods for sharpening a knife, just as there are various methods for making stock or roasting a chicken. There is no one right way; you must choose the strategy that suits you personally the best. The method for sharpening knives in Japan that is typically used is shown here.
Soaking
The whetstone should be submerged in water until the bubbles stop erupting (ceramic stones that have not been baked do not require soaking prior to use).
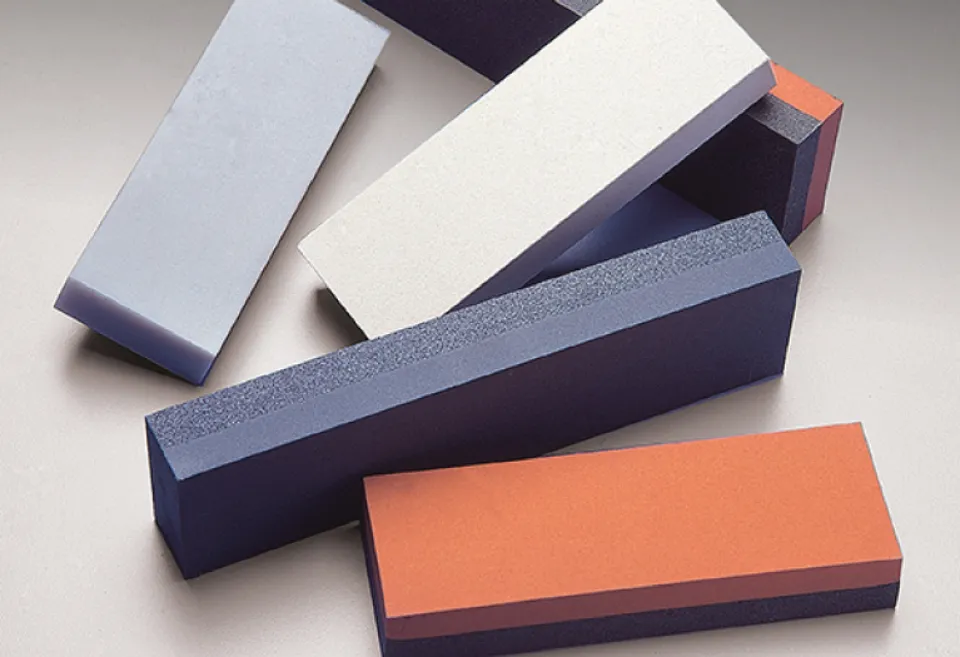
Choose the Grit
If you have any nicks, begin by using a rough grit stone. Start with a medium grit stone if you want to sharpen a slightly dull knife. Use a fine grit stone if all you want to do is realign and polish your edge.
Make your choice of a comfortable working surface. Both the height and the angle shouldn’t require you to hunch over or strain your shoulders. Make sure the sharpening stone is vertically in front of you and that its base is solid.
Make sure that your stone is flat.
Use a Stone Fixer to Level the Sharpening Surface
Once you can see that the stone is completely flat, continue to flatten the surface.
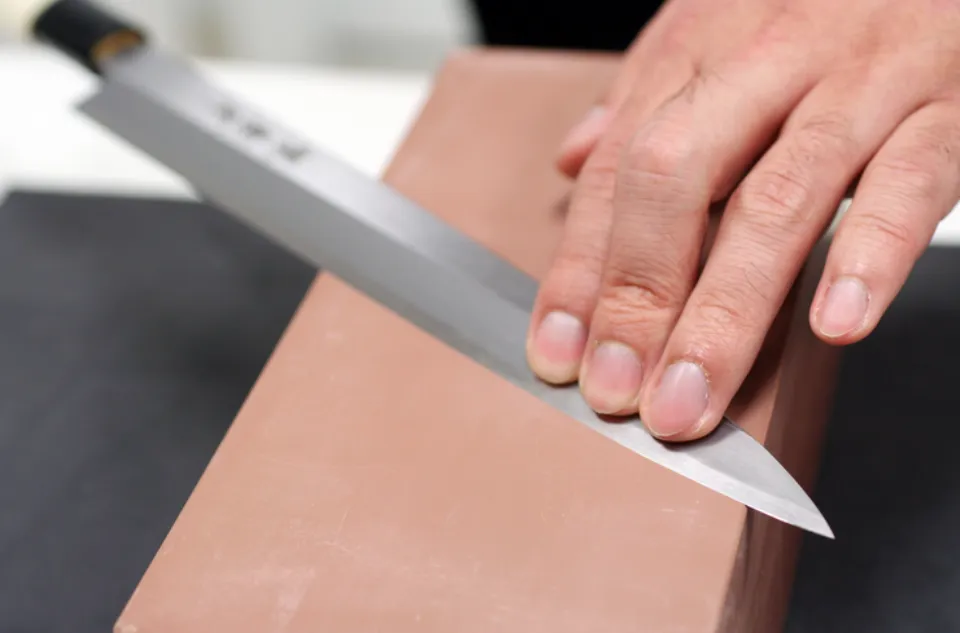
Hold Three Points on Your Knife
With the tip of the knife facing away from you and the heel facing inward, hold the three points at a 45-degree angle. The angles of your arms should not be awkward; they should be relaxed.
Hold the blade 45 degrees away from the stone’s surface if it has a small nick on it. Hold it at a shallower angle if you are only looking to lightly sharpen it (if you press the bevel right up against the stone, you shouldn’t be able to see a shadow between the blade and stone).
Start with the section closest to the tip and work your way towards the heel of the knife if it has three distinct sections. To prevent your knife from swiveling around as you sharpen each area, lower your fingers as you work. You can reduce your risk of accidents by lifting your pinky. Use a little more force when pushing the knife forward but relax your arms and follow a rhythm that works for you.
You should be able to feel the burr (raised edge) if you run your fingers from the spine to the edge on the side that was facing up. Otherwise, keep honing.
Hold the knife at a 45-degree angle once more, this time with the heel facing away from you, to realign or remove this burr. The desired bevel angle ratio will determine how much time you spend on the opposite side of your blade. A single bevel Japanese-style knife still needs to have the back side sharpened if you want to keep the edge from eventually bending over. Just flatten the blade against the stone while sharpening.
You Should Not Be Able to Feel a Burr
To achieve a smooth surface along the bevel, repeat the sharpening process if you used a coarse grit initially, then move on to a medium and then fine grit. Finally, for a finishing touch, realign the edge of the blade by stropping (or brushing) it against your jeans or newspaper (leather is not the only material you can use).
Knife Sharpening Fundamentals
- Read your knife: first, you need to analyse and feel the blade. Does it have nicks or is it sharp? What state is the edge in? Once you can read your knife, you can even modify the angle ratio. For instance, you can achieve a knife that is more resemblant of a Japanese style knife by sharpening a double bevel knife with a 50/50 angle ratio to 60/40 or 70/30.
- Keep your stone flat: when the stone is concave it is hard to control the arc of the knife. Many people downplay the significance of using a stone fixer to smooth out the surface of whetstones.
- Use a stable surface: the stone should not budge while you sharpen.
How to Tell If Your Knife is Sharp Enough?
Even the best knives eventually become dull from constant use. Put your knife to the paper test to see if it needs to be sharpened. Grasp a newspaper by one end and fold it, being careful not to crease it. (A single sheet of standard printer/copy paper can also be used.) Lay the blade against the top edge at an angle and slice outward. Try steeling the knife if it won’t cut through food cleanly. If it still fails, it needs sharpening.
Is It Possible to Over-Sharpen Your Knives?
In short, the answer is no. Don’t believe these common sharpening myths:
MYTH: Metal is removed excessively by electric sharpeners.
TRUTH: Excessive metal loss is not a concern when using the proper brand of electric sharpener. Electric sharpeners do take off a small amount of metal each time you grind your knife—especially if you are using a coarse-grind setting to sharpen an especially dull knife. But the sharpening options on our favorite electric sharpeners are three: coarse, fine, and a nonmotorized steel. You will frequently use the fine slot to polish a knife that is only marginally dull. You shouldn’t be concerned about metal loss because using the lightest sharpening option will preserve the knife’s edge rather than giving it a coarse slot’s intense regrind.
Sharpening Vs. Honing
What does “sharpening a knife” actually entail? Many of us have an image of someone quickly running a knife’s blade up and down a long steel rod when we think of the sharpening process. Spoiler alert: That’s actually a process called honing. Instead of sharpening the blade, a honing steel, which is that large, long rod with a handle, realigns it using friction. With regular use, the knife’s thin edge dents and becomes warped. Your knife’s edge has numerous bends and folds that can be seen if you were to examine it at a microscopic level. This gradually reduces the blade’s precision, giving it a duller feel. The edge is realigned and the dents and dings are pushed back into place by honing, which also balances the edge. While the knife may appear to be sharper when in use, the blade’s sharpness hasn’t changed at all.
On the other hand, sharpening is a process that physically removes material from the blade. By sanding each side of the blade to create a thinner and, consequently, sharper edge, you can sharpen knives on a tabletop or with a whetstone.

FAQs
What is the Easiest Way to Sharpen a Knife?
To sharpen your knives at home, you can use an electric sharpener or a whetstone (also called a sharpening stone). Stones are typically preferred because they are easier to use, less expensive, and more gentle on blades than electric sharpeners are.
Why Are Japanese Chef Knives So Sharp?
Most quality Japanese knives can be sharpened to a much finer angle at the cutting edge because of the harder steel. This results in a sharper knife that slices and chops through food with ease and has the added advantage of putting less strain on the hand’s joints and muscles.
Is It Better to Sharpen a Knife Wet Or Dry?
Natural sharpening stones can be used dry or wet, but wet is recommended. Water, water-based honing oil or petroleum- based honing oil keeps the pores of the stone clean, dissipates frictional heat and ensures smooth sharpening action.
Is It Better to Sharpen a Knife Wet Or Dry?
Natural sharpening stones can be used dry or wet, but wet is recommended. Water, water-based honing oil or petroleum- based honing oil keeps the pores of the stone clean, dissipates frictional heat and ensures smooth sharpening action.
Keeping Your Knife Sharp
How to Sharpen a Kitchen Knife? You need to hold your knife stable, soaking, choose the grit, use a stone fixer to level the sharpening surface, hold three points on your knife, and you should not be able to feel a burr…
Once you go through the trouble of sharpening your knife, you’ll want to keep that fresh edge as long as possible and avoid unintentionally fast-tracking your way back to a dull blade. To accomplish this, keep your knife away from other metals. This means that you should never throw your knife in the sink and that you shouldn’t keep it loose in a drawer with other utensils. Most importantly, no matter what, never put your knife in the dishwasher; that’s a one-way ticket to a ruined knife. Hand-wash and dry your knife and always store it in a plastic sheath.
If you have any questions, please leave a comment. My Prime Home tries to give you the best furniture information. Thank you for reading.