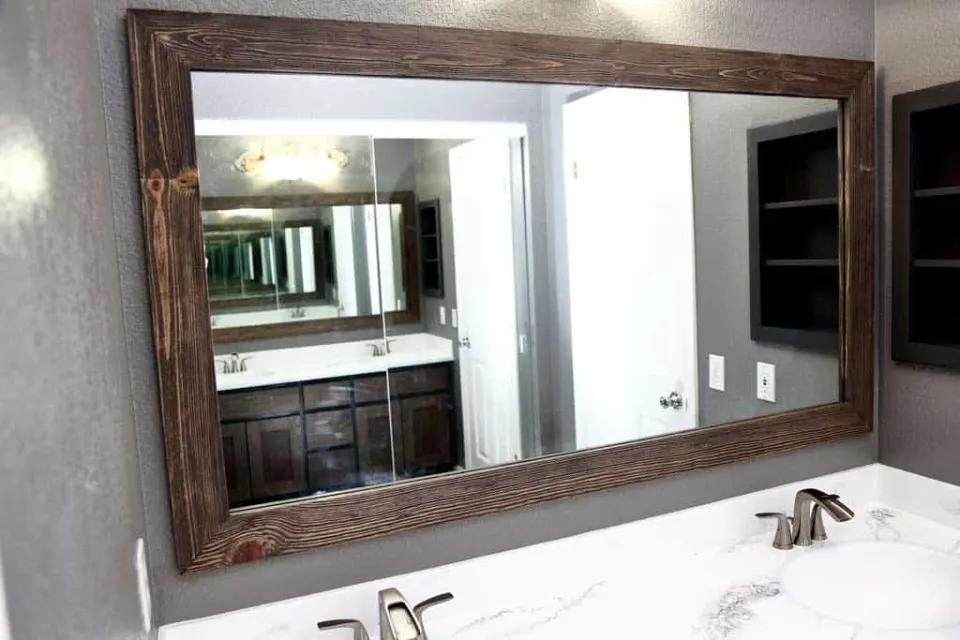
This DIY tutorial will show you how to frame a bathroom mirror to add instant character and equity to your bathroom.
Frame a bathroom mirror: collect the required tools and materials, then cut the frame casing, glue the joints together, fill the gaps and paint the frame, and glue the frame to the mirror.
For more specific information, keep reading.
Frame a Bathroom Mirror: Required Tools and Materials
Tools
- Miter Saw
- Caulk Gun
- Tape Measure
- Square
- Level
Materials
- 3-1/4-in x 8-ft White Casing
- Interior/Exterior Construction Adhesive
- Construction Adhesive for Mirrors (If Installing a New Mirror)
- Spackling or Wood Putty
- Interior Paint
Read about:
How to Frame a Bathroom Mirror?
Here is an easy step-by-step guide on how to frame a bathroom mirror:
Cut the Frame Casing
Add 2 inches to the mirror’s length and width after measuring it. Take the casing and cut the top, bottom and sides to those lengths (on the outside edge) with 45-degree miters on both ends using your miter saw (this should leave a 1-inch overhang when installed on the mirror). Use painters tape to hold the corners together and assemble the frame without glue on a flat surface to check for gaps.
Tip:
Cutting the opposing pieces to the same length is one trick to a beautiful frame. Check the part lengths against each other instead of a tape measure to make sure they’re equal.
Glue the Joints Together
Apply an even coat of interior/exterior construction adhesive on the mitered ends of each joint and assemble the frame on a flat surface using painters tape; let dry.
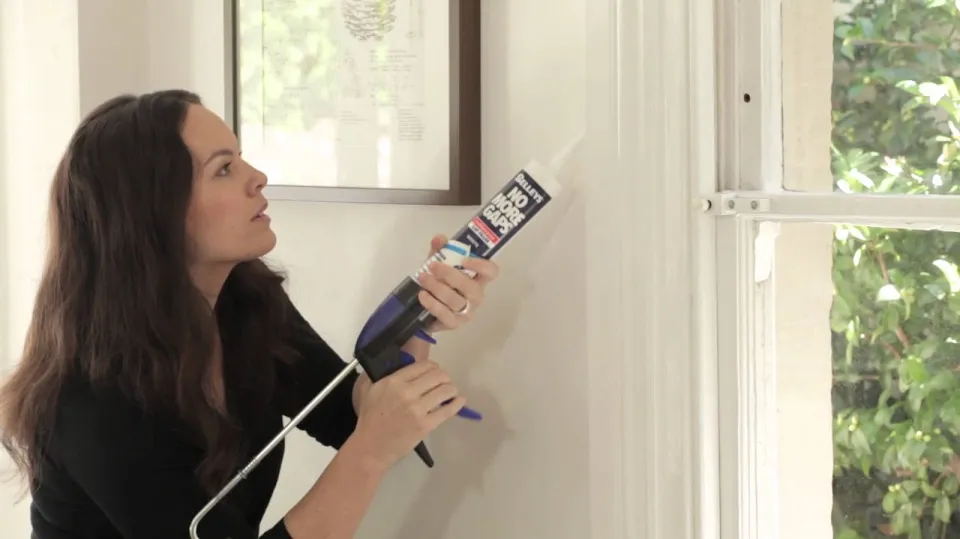
Fill the Gaps and Paint the Frame
Fill any miter gaps with putty or wood filler, wipe away the excess and let dry. Then apply two coats of paint. We used Valspar® Signature paint in Sunday Times (ar915).
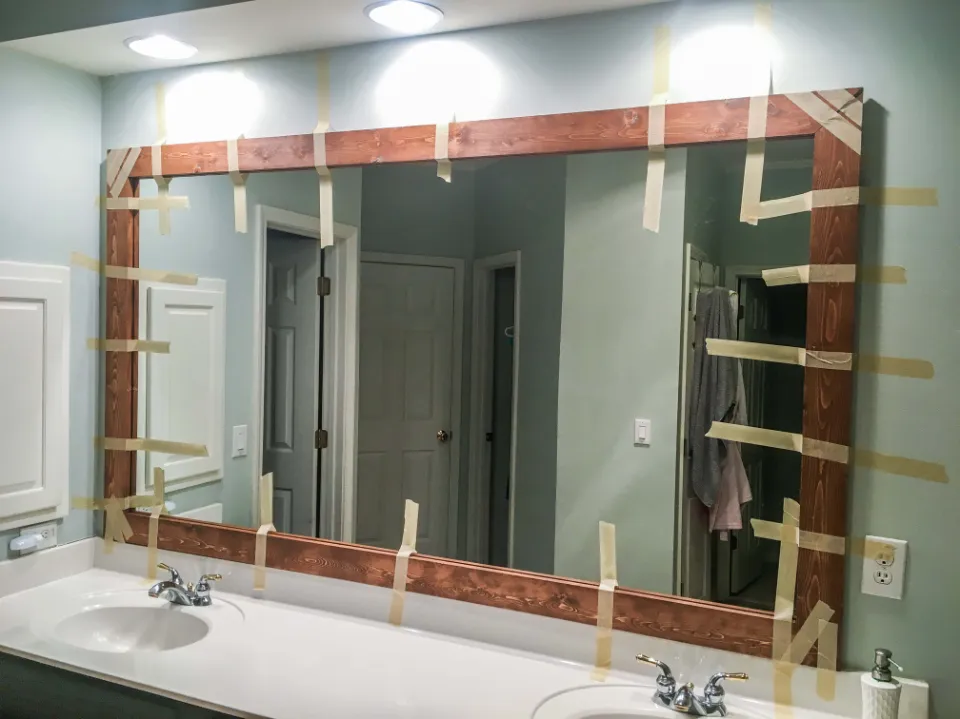
Glue the Frame to the Mirror
Apply two parallel 1/4-inch beads of construction adhesive around the back of the frame, working at least an inch in from the edges. To leave a 1-inch overhang on each of the four sides, gently press and hold the frame of the mirror in place. Immediately check the frame with a level and make adjustments as needed. If necessary, hold the frame against the wall with painters tape while the adhesive dries.
Tip
There may be a gap around the edge of the frame due to the mirror’s thickness. If that’s a problem, fill the gap with a bead of caulk and smooth the caulk even with the edges of the frame. The patch will be covered by a small amount of touch-up paint around the mirror’s edge.
Tip
Want a faster method? Pick up a mirror frame kit to get a sophisticated new look in half of the time.
Tips for Framing a Bathroom Mirror
I do want to tell you a few TIPS I had.
Tip: Get a caulking gun to apply your liquid nails. Avoid having to make a second trip to the store or the hassle of attempting to apply it without a gun!) and make sure you pick one up.
Tip: Also, be generous with the amount of Liquid Nails you use. In the molding’s middle, place the liquid nails. To prevent seepage onto your mirror when you press it, make sure to stay away from the edges. I was a little afraid of this, so I applied the liquid nails too thinly to prevent a mess from seeping. The next day when it was supposed to be dry, my molding was bowed in the corners of my mirror and not stuck to the glass because I didn’t have enough liquid nails holding it down.
Tip: If your molding is bowing in the morning, don’t give up and leave. Don’t make the commitment to never take on another home improvement project. Don’t let this project languish for a week before considering hiring someone to fix it. Add a few more liquid nails, then allow it to dry overnight again. I may have done the above dramatics and when I realized how easy the fix was, I felt silly.

FAQs
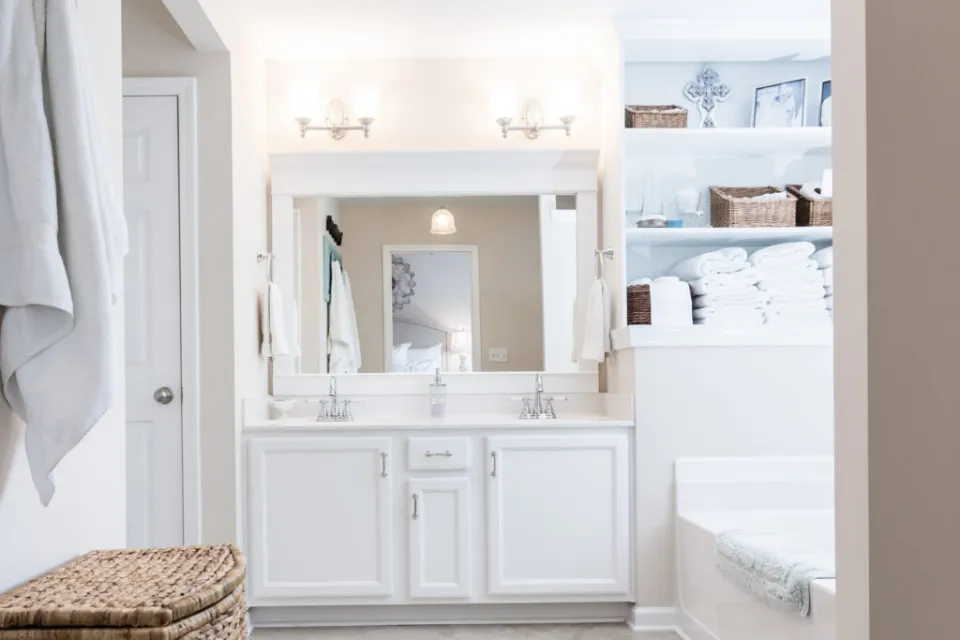
Can You Frame An Existing Bathroom Mirror?
Adding a frame to a builder grade bathroom mirror is an easy and cost effective way to update the mirror without having to remove it or replace it. One weekend can be used to finish this project, and it is very cost-effective.
Can You Frame a Frameless Bathroom Mirror?
Though their raw edges don’t add much to the decor of the room, frameless mirrors serve their practical purpose well. You can dress up your mirrors by adding a simple frame that matches your room’s woodwork or complements the room’s color scheme.
What Material to Frame a Bathroom Mirror?
A common mirror frame material is aluminum due to the versatility and strength of the material. It is also extremely water-resistant and thrives in a bathroom environment.
How Do You Attach a Frame to a Mirror?
Use construction adhesive or wood glue to attach the frame to the mirror, piece by piece, starting with the bottom piece. When the glue is about an inch from the frame’s edges on the back, press the frame against the mirror. Hold the pieces against the mirror while they dry using painter’s tape.
Can You Turn a Mirror into a Frame?
Around the mirror’s edge or the inside lip of the frame, run a thin bead of silicone. Carefully align the mirror to the back and press it into place. You could also fasten the mirror to the backing material if the picture frame has one in order to keep it in place.
Summary: How to Frame a Bathroom Mirror?
How to frame a bathroom mirror? Collect the required tools and materials, then cut the frame casing, glue the joints together, fill the gaps and paint the frame, and glue the frame to the mirror.
Adding a frame to a builder grade bathroom mirror is an easy and cost effective way to update the mirror without having to remove it or replace it. This project can be completed in one weekend and is extremely budget friendly. Each bathroom mirror costs around $20 total!
If you have any questions, please leave a comment. If you like the post, please share it with your friends. Thank you for reading.