Have you already made up your mind to paint some IKEA furniture? Don’t know where to begin?
No worries!
Together, let’s examine every painting technique for IKEA furniture that will help you create a polished, durable finish.
This guide will cover how to paint:
Table of Contents
What Kind of Paint Works Best?
To paint IKEA furniture, you’ll need three different kinds: a primer, a topcoat, and a sealer. A primer made specifically for laminate surfaces is required, such as this one from Zinsser. Your laminate particleboard surface will be prepared so that whatever paint you decide to use will adhere to it and not easily peel off.
Applying a final coat of sealant will ensure that your freshly painted surface lasts after you have painted over your primer with the color of your choice.
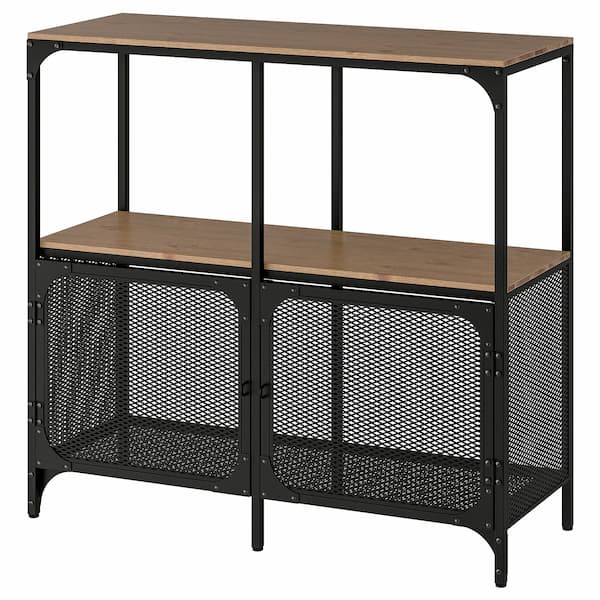
Paint IKEA Laminate Furniture

We’ll start by discussing painting laminate pieces because that surface is the most difficult to master.
Tired of reading? Watch my video instead
You can also watch me paint and transform this boring Kallax unit:
There are many terrifying tales about how things went wrong and the paint began to peel off after just two days.
I assure you, your paint is not going to peel off if you follow these steps!
It’s also probably the scenario you’ll run into the most often when trying to paint IKEA furniture because of the large number of laminated (acrylic covered) IKEA products.
Sanding your piece before priming and painting is not necessary with this technique. To achieve a flawlessly pristine and smooth finish, some people swear by sanding every single layer. It won’t harm any of your work, so go ahead and do it if you want to! Decide if it’s worth the effort and go for it if you feel like it’s necessary
MATERIALS:
- Shellac-base primer – I recommend this one from Zinsser(if you missed the part about why it’s awesome, then scroll back up!)
- Sanding paper (optional)
- Brushes, rollers or spray gun
- Rag or paper towels
- Paint
- Topcoat
| STEPS FOR PAINTING ON LAMINATE: 1. If possible, disassemble the object. Remove any hardware, such as knobs or pulls, if you are unable to disassemble. 2. Clean your furniture with water and a damp (not dripping wet!) cloth.) paper towel or cloth. To avoid having it buried beneath the paint, you should clear away any dust, grime, or residue that can be done so. Allow to dry; it takes very little time. 3. Typically, only one coat of primer is required. OPTIONAL: The primer can be scratched with sandpaper after it has dried, but it is not really necessary. Sand your primer if that’s what you really want to do. As directed on the product, give it time to dry. 4. Paint your piece. You may require multiple coats of paint – make sure you allow time to dry in between coats. OPTIONAL: If you want, you can sand in between paint coats. If you have paint drips, brushstrokes, or any other small particles in your paint, I advise doing this. All of that can be smoothed out with sanding. 5. Add your topcoat after your furniture has completely dried. The product’s instructions should be followed regarding drying time. 6. If necessary, reassemble, and replace all hardware. |
You can see some of my IKEA painting projects in the videos up top if you missed them.! And below is an example of laminate furniture that One summer, I painted a picture for my mother. In reality, it’s just an old laminate dresser that my mother wanted to throw away; it’s not even an IKEA item. Instead, I turned it into a TV console for her since she was in need of one.
Sorry for the blurry photo, haha!
The transformation was incredibly simple; all I had to do was take the mirror out and give it one coat of Zinsser primer without sanding.!) and gave it 4 coats of a paint color that my mum picked out. Although I don’t think the pictures really show it, it’s kind of a light sage green. Anyway, the paint used was your typical, everyday indoor water-based latex paint.
The original piece was in great condition; all it needed was a fresh coat of paint. I especially liked the brass trim and handles.
Paint IKEA Solid Wood Furniture
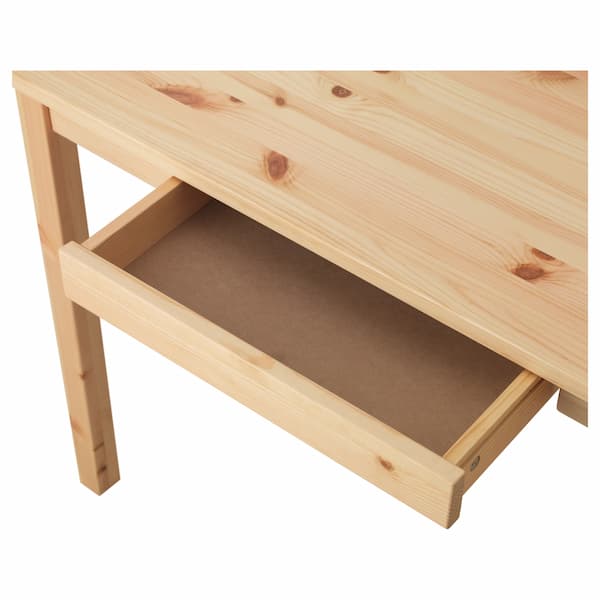
If you do some research, there are numerous techniques available and solid wood is more forgiving.
I have tried many of these methods and have found the following to work best:
MATERIALS:
- Sanding paper and a sanding block
- Orbital sander(optional)
- Rags or paper towels
- Brushes, rollers or spray gun
- Primer
- Paint
- Top coat
| STEPS FOR PAINTING ON SOLID WOOD: 1. In case you can, disassemble. Remove any hardware, such as knobs or pulls, if you are unable to disassemble. 2. Sand your piece lightly using orbital sanders or sandpaper. With a wet rag or paper towel and some water, remove the sanding dust. 3. Only one coat of primer is typically required. OPTIONAL: After the primer has dried, you can scratch it with sandpaper if you like, but it’s not really necessary. Sand your primer if that’s what you really want to do. According to the product’s instructions, give it time to dry. 4. You might need to apply several coats of paint to your piece; make sure to give them enough time to dry between applications. OPTIONAL: If you want to, you can sand in between coats of paint! If your paint has any obvious drips, brushstrokes, or small particles stuck in it, I advise doing this. All of that can be buffed out with sanding. 5. The top coat can be applied after the furniture has completely dried. According to the product’s instructions, give it time to dry. 6. Reassemble if necessary, and reinstall all hardware. |
Paint IKEA Metal Furniture
To be completely honest, I don’t bother disassembling a metal object that I intend to spray paint if it isn’t overly complicated.
The reality is that metal DOES need a primer and, ideally, a topcoat, as I’ve discovered from experience. Otherwise, even the slightest bump will cause the spray paint to simply scratch off!
You *will* need to sand your piece if there is any rust, flaking, or loose paint.
MATERIALS:
- Scraper
- Wire brush
- 80 grit to 120 grit sanding paper
- Orbital sander(optional)
- Sponge
- Rags or paper towels
- Primer
- Paint
| STEPS FOR PAINTING ON METAL: IF YOUR PIECE HAS FLAKING OR PEELING PAINT: 1. If the paint on your piece is flaking or peeling, you must sand it down and scrape off the loose paint. Utilize a wire brush and a scraper. 2. Beginning with sanding paper of 60 or 80 grit and working your way up to 120 grit, sand the piece. 3. To get rid of all dust and rust flecks, clean your piece with a sponge and some water. Complete drying is required. 4. Prime 5. Paint might require several coats. Allow to dry in accordance with the tin’s instructions. IF YOUR PIECE *DOES NOT* HAVE FLAKING OR PEELING PAINT: 1. Quickly clean your piece with water and a wet rag or paper towel. 2. Prime 3. It might need a few coats of paint. In accordance with the tin’s instructions, allow to dry. |
Pro Tips:
- Select a primer with a shellac base if at all possible. The best defense against paint chipping for a piece of furniture that will be subjected to heavy use is a product that stinks awful but dries rock hard.
- The best tool for the job is a super smooth roller brush, but if you want an even more expert finish, use a paint sprayer.
- Always paint furniture while it is disassembled.
- Before assembling and using your piece of furniture, give the sealant as much time as you can to dry.
Suggested reading: One of the best ways to quickly improve the appearance and ambiance of a space where you probably spend a lot of time is by updating your kitchen cabinets. So, how much does it cost to paint kitchen cabinets?
Do you have a fantastic DIY project or tutorial you’d like to share with others? If you have any recipes you’d like to share, please do so; we enjoy seeing what our readers are cooking these days.
Thank you for reading.
Read about
FAQs
What Paint Do You Use on Ikea Furniture?
Chalk paint is often used for painting furniture. This is due to the fact that it comes in a wide variety of colors, applies easily (even in nooks and crannies), and the majority of chalk paints don’t require a primer.
Can You Paint Straight onto Ikea Furniture?
Yes, you can paint RTA furniture from IKEA or any other store. Naturally, not all IKEA furniture is covered by this rule. Any fabric-covered object shouldn’t be painted, in our opinion.
Can You Paint over Ikea Furniture Without Sanding?
If you’re painting a small shelf or low-traffic item, sanding isn’t necessary when using the correct primer. But before you begin painting a larger object, lightly sand it or use a fine-grit sanding block to remove any gloss.
Do You Have to Prime Furniture before Painting?
It is best to prime all painting surfaces to prevent stains from bleeding through the new paint. The type of paint you choose must be compatible with the primer. It’s best to use a satin or semigloss finish in latex or oil-based paint on furniture. You should never paint over primer.
What Happens If You Paint Furniture Without Primer?
If you skip the cleaning, deglosser or primer, then your paint will only have a slippery/grimy surface to try to adhere to. Additionally, paint doesn’t work that well by itself!
What Happens If You Don’t Sand Furniture before Painting?
Furniture comes in a variety of materials, and almost all of them will need some degree of sanding to ensure that paint adheres to the surface because it gets rid of any flaws or dimples. Sanding also ensures an even, smooth finish that will make it less likely to chip or peel.
Is It OK to Just Use Primer as Paint?
Since primer’s function is mainly to bond and cover porous surfaces, it is not made to withstand elements like paint. Because of this, primer will degrade and break down if you don’t apply a top coat (or paint), probably in the form of chalk.