Drum belts for dryers come in different shapes and sizes depending on the model. So, how to replace a dryer belt?
- Disconnect the Dryer
- Remove the Old Belt
- Install the New Belt
- Put the Dryer Back Together
- Reconnect the Dryer
Maytag dryer belts, Kenmore dryer belts, Whirlpool dryer belts, and GE dryer belts are a few of the well-known brands. Make sure you buy the exact replacement drum belt for your model.
How to Replace Dryer Belt?
Below are the details:
Disconnect the Dryer
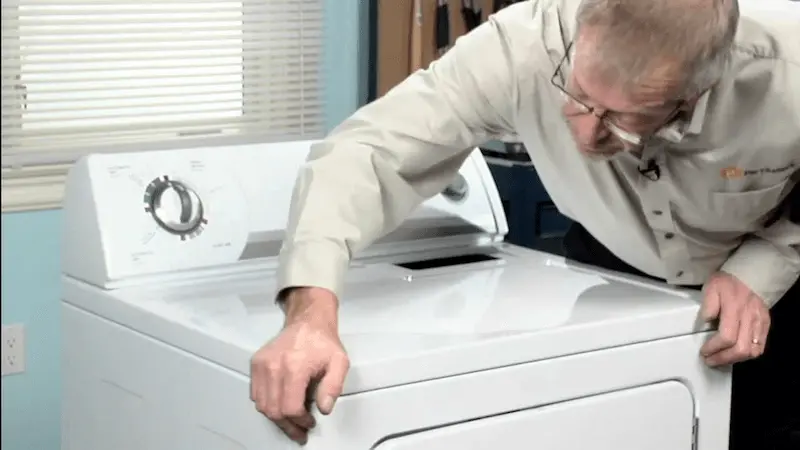
The dryer must be unplugged from the power source as a first step. The dryer can then be removed from its cabinet (if necessary) so that you can work on it.
Remove the Old Belt
The next step is to remove the old belt from the dryer; to do that:
- Take off the dryer’s top panel. It is attached by screws, so you must take those out before it will slide off and unclip at the front.
- Take the control panel off. To lift the control panel up and out slightly, you must first remove the screws that go through the plastic tabs on the back of the control panel unit. You can fully remove the control panel once you disconnect the wire harnesses by unlatching the tabs.
- To remove the two screws, open the dryer door. Depending on the particular make and model of the dryer, they might be placed in a slightly different location.
- The screws holding the front panel’s top to the support piece need to be removed. The wire harness that connects to the door switch can then be disconnected after carefully pulling the panel out.
- You can unplug the wire harness that is attached to the light bulb, which should be there.
- By removing the screws, you can take out the support piece. A screw holding the control board to the support piece may need to be removed as well.
- The top wire harness can be detached from the harness restraints and put out of the way once the support piece has been removed.
- At this point, you can unplug the sensor’s wire harness, which is located at the dryer’s base.
- The bulkhead’s screws must be removed. The dryer bulkhead can then be taken out of the way and removed from the dryer.
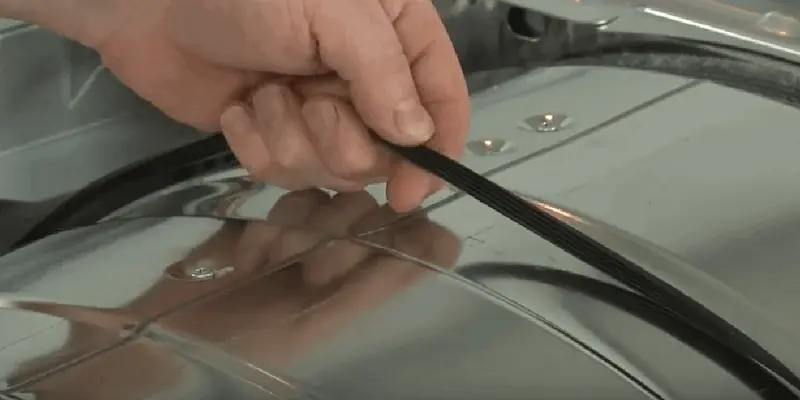
- You now have complete access to the previous drum belt. It can be removed from the dryer by unscrewing it from the motor shaft and idler pulley.
- The dryer drum should now be easily removable from the dryer cabinet by being lifted off the rear drum rollers and, if present, the front drum rollers.
Install the New Belt
The new belt needs to be installed now that the old belt has been taken off. To do this:
- Put the belt around the drum with caution, making sure that the groove side is up against the dryer drum.
- Reposition the drum inside the dryer cabinet on the drum rollers by lifting it up and making sure it is flush with the back bulkhead.
- Make sure the belt is centered throughout the entire drum.
- Reattach the new belt to the motor and idler pulleys in the same location as the old one.
- By slowly rotating the drum, you can check to see if the drum belt is fastened properly. The blower should turn with the drum when you turn it around; if it does, the connection is sound, and you can move on to the next step.
Put the Dryer Back Together
You must put the dryer back together after the new drum belt has been properly installed in order to test it. To put the dryer back together you need to:
- By rethreading the screws, you can reattach the front bulkhead. You must also rethread any screws your model may have had going from the bulkhead to the blower housing.
- Reconnect the sensor’s lower wire harness.
- Connect the upper wire harness to the light bulb after reattaching it to the harness restraints.
- Re-secure the support component. To accomplish this, place it in the appropriate slots and rethread the screws.
- Reconnect the two control board harness connectors by putting them through the support piece’s opening.
- By clipping it back into place and rethreading the screws, the front panel can be reattached.
- Rethreading the screws after reconnecting the wire harness will allow you to reattach the console and fix it in the proper location.
- The two screws by the lint filter housing that you previously removed should be rethreaded.
- Now you can screw the last few panels back into place and reattach them. Now that everything is securely fastened again, you can test your dryer.
Reconnect the Dryer
Reconnecting your dryer to its power source is the last step, after which you should check to see if it is now operating properly. If the test is successful, your dryer is completely fixed and ready to use.
Signs You Need to Replace Your Dryer Belt
A broken dryer belt is a perfect illustration of this type of repair. The following 4 issues could mean that the dryer belt needs to be replaced.
- Dryer Won’t Start. Of course, there are a variety of reasons your dryer could malfunction and stop working after you press the start button. It’s possible that you have an electrical issue, a power supply issue, a door sensor problem, or some other problem. You should also look into the possibility that the dryer belt may be the source of this issue.
- Dryer Stops Before Clothes Are Dry. The dryer belt is most likely the cause of a dryer that stops spinning before the clothes are fully dried and won’t restart. If you can restart the machine after it abruptly stops spinning, the moisture sensor may be malfunctioning.
- Belt Noises. The most likely cause of rhythmic thumping sounds that can’t be attributed to a sneaker or other heavy object spinning around in the dryer is a loose dryer belt. Waiting until the belt actually breaks before getting a dryer repair may be possible if you can tolerate the noise. But if you simply changed the belt at this time, it would be more convenient and actually better for the wear and tear of your dryer.
- Drum Won’t Turn. The issue is almost certainly with your dryer belt if you can hear the dryer motor running but the drum isn’t even turning. The motor can run as much as it wants without the belt attached, but the drum will not move.
How Does a Dryer Drum Belt Work?
The dryer belt wraps around the outside of the drum, is looped onto a drive pulley attached to the dryer motor shaft, which drives the belt, and around an idler pulley, which applies tension to the belt. This tension is what makes the belt grip the outside of the drum and turn it. The belt may start to slip if the drum is overloaded or if a pulley, bearing, roller, glide, or other component fails. The belt may eventually fray and break with time. The motor may continue to run after the belt snaps, but the drum won’t turn. On some dryer models, a broken belt will trigger a belt switch, stopping the motor from operating.
Read about How Long Does a Dryer Take?
So, How to Replace a Dryer Belt?
It is necessary to disassemble the dryer cabinet in order to replace the drum belt. Each model will require a different procedure, but you can use the following steps as a general outline.
- Disconnect the Dryer
- Remove the Old Belt
- Install the New Belt
- Put the Dryer Back Together
- Reconnect the Dryer
Thank you for reading.